Troubleshoot Guide for HydraVeil
Easy soothing for any problems

Video Form:
This guide is also available in video form, if you hate to read docs. Also go to the “Options” button, then the “Debug Help” section.
You DON’T have to read this guide to use it.
Don’t let this guide intimidate you from trying it out. Just because we offer support for less technically savvy users, doesn’t mean you’re going to have a problem.
Just because this guide exists, doesn’t mean these issues will plague you.
Q: It doesn’t work, what do I do?
Step 1: Supported Distros
Are you using one of the supported distros? It can’t be too OLD a version of Ubuntu (before Ubuntu 22) or Debian-based ones. Please see the list of distros.
Step 2: Pre-reqs
Do you have the pre-reqs installed? Please see this page of the pre-reqs.
Step 3: Open the GUI via the CLI
First, try to open the GUI in the command line to see the terminal errors.
./hydra-veil-x86_64.AppImage
Note: You have to be inside the folder with the AppImage to run this. Also if you’re using a different profile slot, then change the number. Finally your appimage may have a different name, and if so, then use the tab button to fill in the rest of the name. So type:
./hydra
Then hit Tab to fill in the rest
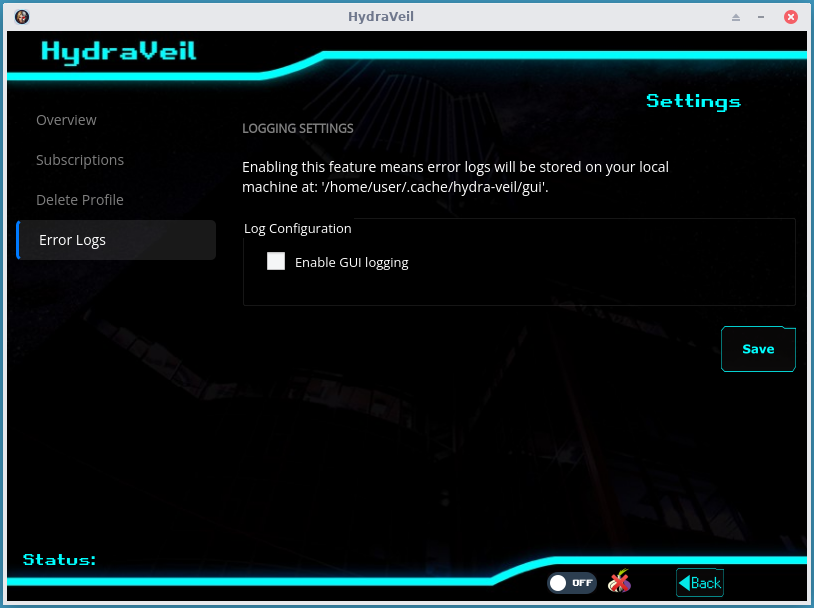
Step 4: Turn on GUI Logs
Go to the “Options” button from the main page, then enable GUI logs.

Then, try the full CLI interface if that won’t even open the GUI.
Step 5: Command Line Version (CLI)
Try to run it from the command line by enabling the profile in question. Each profile is a number based on what slot it’s on in the GUI, with the top left being 1. Second profile to the right of this is 2. And the last one is 6.
So if you want to run the first one then do this command:
./hydra-veil-x86_64.AppImage --cli profile enable -i 1
Note: You have to be inside the folder with the AppImage to run this. Also if you’re using a different profile slot, then change the number. Finally your appimage may have a different name, and if so, then use the tab button to fill in the rest of the name.
Step 6: Wireguard Test:
Another possibility is to test the Wireguard configuration, by using the default Linux package to run it system-wide. You can do this with ANY wireguard profile, so both system-wide AND browser-only.
Testing Browser Only:
If it’s in the first slot then:
sudo wg-quick up '.config/hydra-veil/profiles/1/wg.conf'
To take it down:
sudo wg-quick down '.config/hydra-veil/profiles/1/wg.conf'
If you’re having problems with these commands, or it says not found, go in the folder:
cd .config/hydra-veil/profiles
And try to find the profile in question by the numbered folder, you can “cd” into a folder number, then:
ls
Testing System-wide:
System-wide is the same process, the only difference is if it’s in the ‘/etc/hydra-veil/profiles’ folder. Remember, you’d have to change the number from 1 to whatever profile slot you picked. If it’s in the first slot then:
sudo wg-quick up '/etc/hydra-veil/profiles/1/wg.conf'
Once it’s up, check your public IP address using any testing website or tool. Then to take it down:
sudo wg-quick down '/etc/hydra-veil/profiles/1/wg.conf'
If you’re having problems with these commands, or it says not found, go in the folder:
sudo cd /etc/hydra-veil/profiles
And try to find the “wg.conf”
sudo ls
Different Ports
Apart from the default WireGuard port, all nodes should accept traffic on “48271” and “52428” as well.
You can modify the port in the Wireguard config to test if it will connect under a different port.
Step 1, Open WireGuared config in any text editor.
You could use nano, xed, mousepad, libreoffice or ANY text editor,
Browser-Only
You can find the system-wide Wireguard configs in this folder, remember the “.” means a hidden folder:
.config/hydra-veil/profiles/
System-wide
You can find the system-wide Wireguard configs in this folder, remember you’ll need the sudo password to access this folder,
/etc/hydra-veil/profiles/
Step 2, Modify the Endpoint Port
You’re going to modify ONLY the line that says “Endpoint”. Don’t change the IP, only the port after the colon :
Endpoint = <server_ip>:<custom_port>
So let’s say it had:
Endpoint = some-ip-here:51820
Modify this to the new port to test, so either 48271 or 52428:
Endpoint = some-ip-here:48271
Whole config would look like this, but you’re only changing the Endpoint line:
# TZ = Ignore this for debug purpose. It's the timezone

[Interface]
PrivateKey = <your_client_private_key>
Address = <local-IP>/32 # Don't change
DNS = 10.13.0.1 # Don't change

[Peer]
PublicKey = <server_public_key>
Endpoint = <server_ip>:<custom_port>  # Replace <custom_port>
AllowedIPs = 0.0.0.0/0
Then after modifying the port, try to connect again via CLI (same as above)
For example for system-wide in the FIRST slot,
sudo wg-quick up '/etc/hydra-veil/profiles/1/wg.conf'
Basic Connection Test
Are you able to connect to the WireGuard node? Try to ping the IP listed in your WG config.
So use ping:
ping <ip here>
Where is the IP?
It’s to the LEFT on the Endpoint line from the steps above:
Endpoint = <server_ip>:<custom_port>
For example if the IP listed is 123.456.789.101:
Endpoint = 123.456.789.101:51820
Then you’d do:
ping 123.456.789.101
You can find the browser-only Wireguard configs in this folder, remember the “.” means a hidden folder:
.config/hydra-veil/profiles/
You can find the system-wide Wireguard configs in this folder, remember you’ll need the sudo password to access this folder,
/etc/hydra-veil/profiles
Q: I can’t connect on Whonix?
Whonix doesn’t allow Wireguard, you have to use a socks5 proxy. And you have to turn Tor off in both the bottom right for the billing, as well as the profiles, because it can’t do Tor twice. Please see our Whonix guide for how to do this.
Q: I can’t open the GUI
First, try to open the GUI in the command line to see the error. (see above) Then, try the CLI interface. Try to sync:
./hydra-veil-x86_64.AppImage --cli sync
For more CLI options do:
./hydra-veil-x86_64.AppImage --cli --help
Q: Not displaying browsers in the full box
Make sure you have ratpoison installed with this command:
ratpoison --help
Q: My browser extension won’t show up
Some browser extensions support full-screen mode, such as MetaMask and Nos2fx. Others such as Flamingo have custom windows that unfortunately our current setup does not support.
If you really want to learn and take your privacy to the next level, Learn about HydraVeil, Access our VPN, and subscribe to our new content via: Arweave Video RSS, Podcast RSS, Session list, Nostr, Bastyon, Article RSS, or join the Signal Group
Related Posts

Tor Sync & Tor Profiles Fixed | Release 2.2.1
Faster Initial App Startup
[SP]
Jan 20, 2026

New Sweden VPN Node
Run by AilliA of XMRBazaar
[SP]
Jan 18, 2026

1 Second Saved | Release 2.1.4
Faster Initial App Startup
[SP]
Jan 16, 2026

It takes a lot to admit you're wrong
But that's what I'm doing today. (v-2-1-1 release)
[SP]
Jan 9, 2026