Mac VPN Tutorial
Easy and Fast Tutorial for Apple Users.

Warning:
Apple is NOT as private as Linux, but we offer this VPN service for people unable to switch for various reasons.
First,
Please go to the billing website to get a subscription:
Click this Link
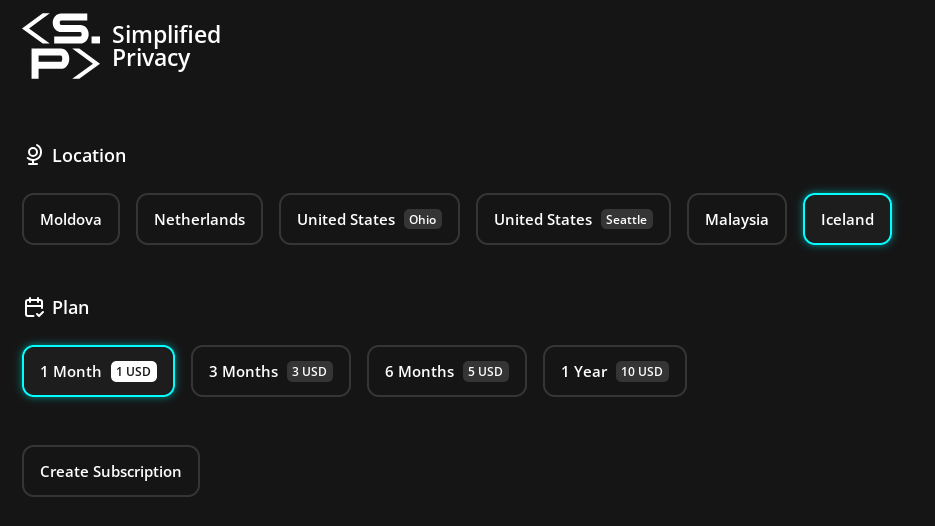
Select your Location & How Long:
In this example, we selected Iceland and one month. Note: this is a screenshot, do not push buttons on these screenshots. You’d do so on the website.
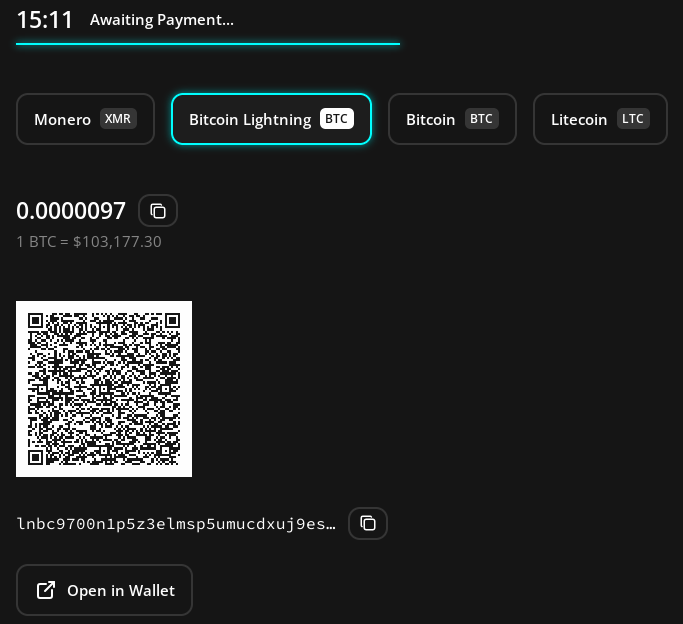
Save your billing code
The little copy-paste button to the right of the code copies it. Save it anywhere on your local computer, like a password manager.
![]()
After you save it, then hit “Go to Invoice”
Pay
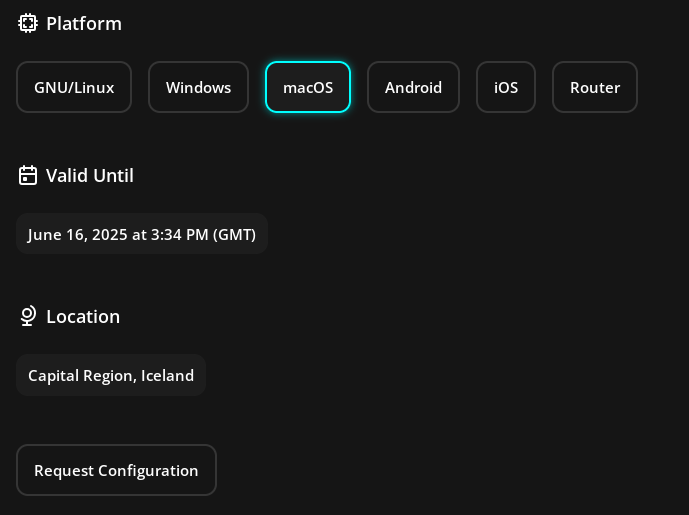
Select Mac
AFTER you pay, select “MacOS”
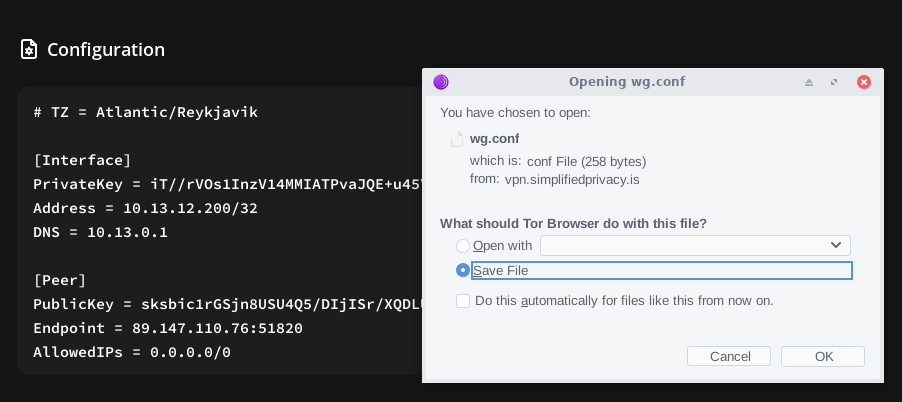
Click the download button,
This file allows you to access the VPN.
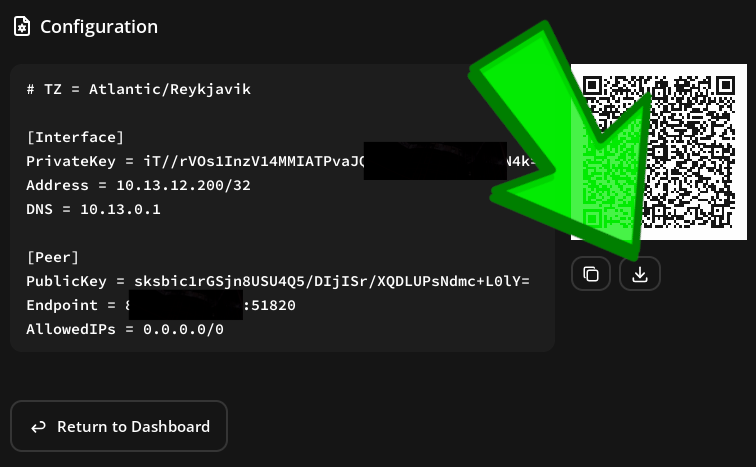
It’s just a text file with a “.conf” ending.
The technical name for it is a “WireGuard configuration file”.
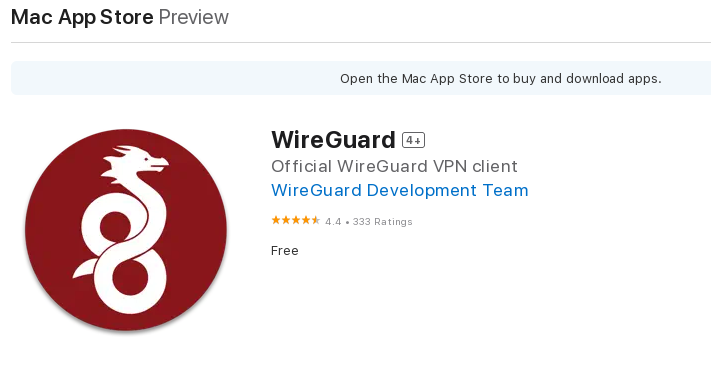
Get App
Get the WireGuard app from the Apple Store:
https://apps.apple.com/us/app/wireguard/id1451685025
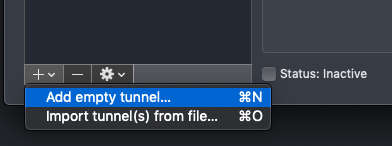
Add Tunnel
Open the Wireguard app, hit “Import tunnels from file(s)” and select the .conf file you downloaded.
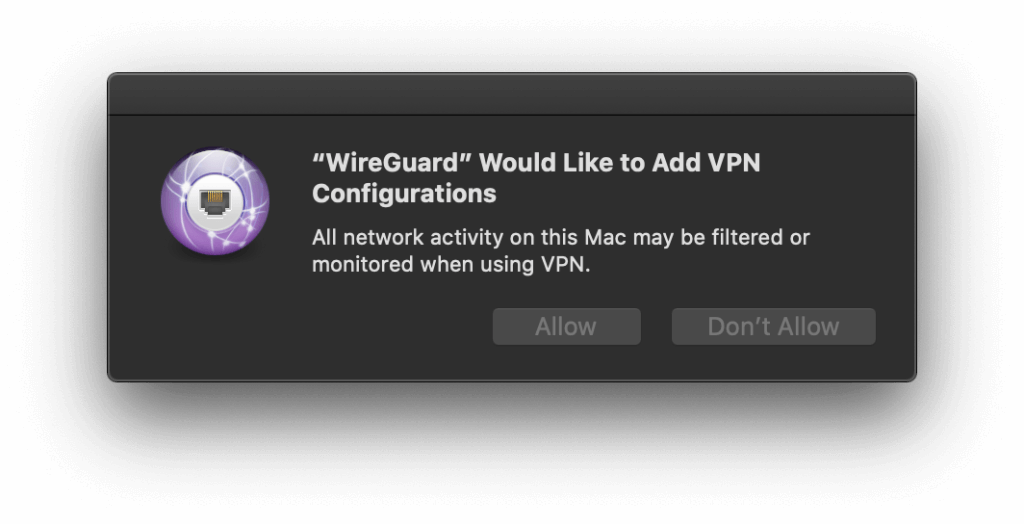
Hit Connect & Allow
Test it
Once connected, please test it on a website like “whatsmyip.com”
If you really want to learn and take your privacy to the next level, Learn about HydraVeil,
Access our VPN, and subscribe to our new content via:
Podcast,
Email List,
Nostr,
Bastyon,
RSS,
or join the Signal Group
Related Posts

Epic Firewall | HydraVeil 2.6.7
We're laying the foundation for multi-protocol obfuscation with advanced firewall features.
[SP]
Jul 28, 2026
Improved Tor Sync & Error Handling | HydraVeil 2.5.7
Solved Tor compatability problems for many distros, and improved database handling.
[SP]
Jul 19, 2026
Blazing Fast UI Upgrade | HydraVeil 2.5.2
No longer does the client fetch all data, but only what changed!
[SP]
Jun 24, 2026

Anonymous Tickets | HydraVeil Release 2.2.6
HydraVeil adds a new privacy-focused billing system.
[SP]
May 23, 2026